Although costumes get all the attention at Halloween, nails can be just as fun — with less commitment of time and money. From Jack-o’-lanterns to ghosts and spider webs, there’s Halloween a nail design that’s right for everyone. And best of all, they’re easy to create from home! Simply grab some colorful polishes and a few tools, then keep scrolling to see the Halloween nail designs that are sure to pretty up your fingernails and boost your spooky spirits.
1. Shimmery ghost French tips
We all need a little sparkle in our lives, even around Halloween! This stunning, shimmery Halloween nail design makes nails pop and puts a twist on the classic French tip with the ghost design.
Get the look:
- Apply two coats of a shimmery champagne polish, like Essie Nail Polish in Heart of Gold, to all nails; Let dry.
- Use a white striping polish, like FingerPaints Striping Polish in Hip Hip Hue-Ray, to paint on crescent shapes at the top of nails for the French tips. On two accent nails, create and fill in an oval shape and then draw a crescent-shape “tail” connecting to the oval for the ghosts. Use black polish to create the eyes and mouth. Let nails dry.
- Seal all nails with top coat.
2. Miniature pumpkins
Looking for a minimalist Halloween nail design? Look no further than this adorable mini pumpkins nail art, which looks so chic and subtle but still festive.
Get the look:
- Paint all nails two coats of a sheer nude-pink polish, like OPI Nature Strong Nail Lacquer in A Clay in the Life; Let dry.
- Use orange polish, like Essie Nail Polish in To DIY For, and a striping brush, like SQULIGT 3PCS Nail Art Liner Brush Set, to paint on mini pumpkins; Simply draw a horizontal oval shape in the center of nail and fill in.
- Use a striping brush and green nail polish, like Sally Hansen Insta-Dri Nail Polish in Chill Out, to paint on stems on each pumpkin.
- After letting nails dry, seal all nails with top coat.
3. Pink-alicious spooky nails
Pink lover through and through? Don’t worry, we’ve got you covered. This pink Halloween mani puts the perfect girly touch on the spooky theme.
Get the look:
- Paint all nails two coats of a light pink polish, like Sally Hansen Insta-Dri Nail Color in Pink Blink; Let dry.
- On the pinky, ring and thumb nails, use a striping brush, like SQULIGT 3PCS Nail Art Liner Brush Set, and neon pink polish, like Nails Inc. Nail Polish in Naked in Neon, to mini ghosts. Create and fill in a small oval and connect a “tail to the end. On the middle nail, do the same steps just with a white polish, like Sally Hansen Insta-Dri Nail Color in White On Time, and on the pointer nail, repeat same steps again with a light neon pink polish, like Nails.INC Quick Drying Nail Polish in Taylor.
- Let all nails dry, then paint on eyes and a mouth on the ghosts with black polish.
- Seal all nails with top coat.
4. Too-cute ‘floating’ ghouls
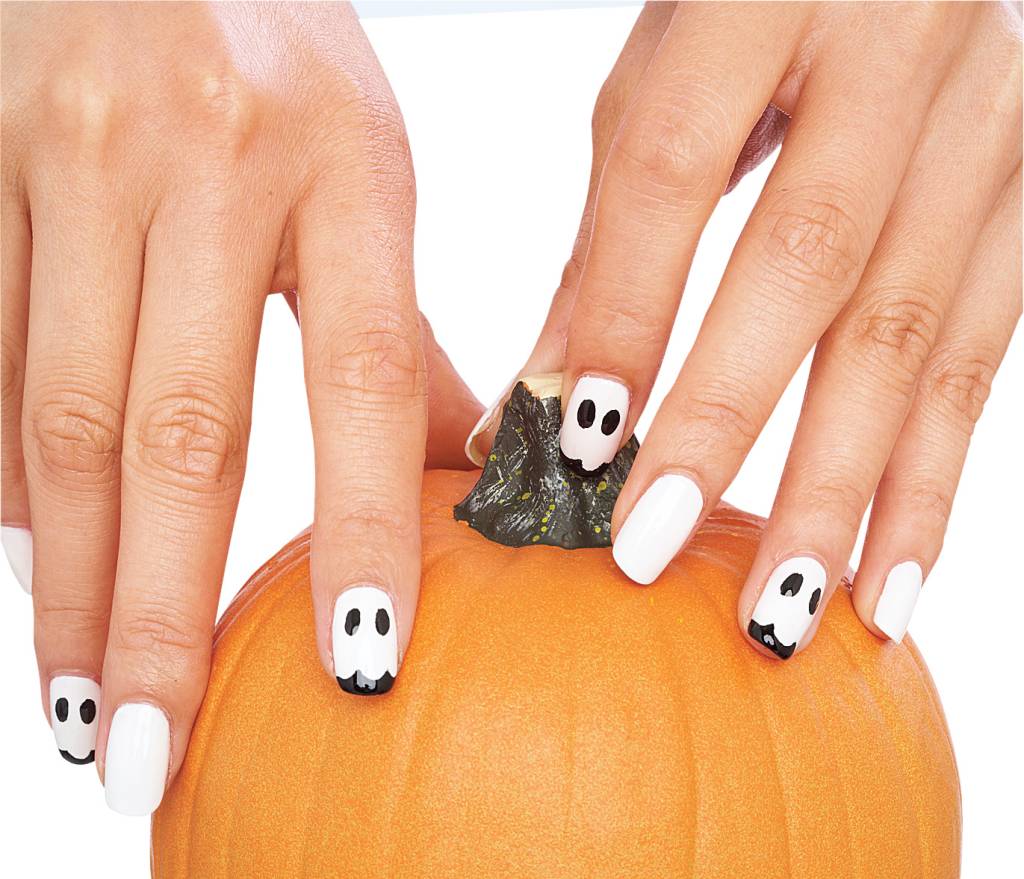
“Opaque white nails put the shape and length of your nails on display,” says celebrity manicurist Patricia Yankee. “And just by scalloping the edge, you can create an adorable little ghost!”
Get the look:
- Apply two coats of white polish, like Sally Hansen Xtreme Wear Nail Polish in White On, on all nails; Let dry.
- Use a nail art brush, like SQULIGT 3PCS Nail Art Liner Brush Set, to create a scallop along the free edge of the pointer and ring fingernails with black polish, like Sally Hansen Xtreme Wear Nail Polish in Black Out. Then, create two oval “eye holes” for each ghost; let dry. Finish with top coat.
5. Wow-worthy witches webs
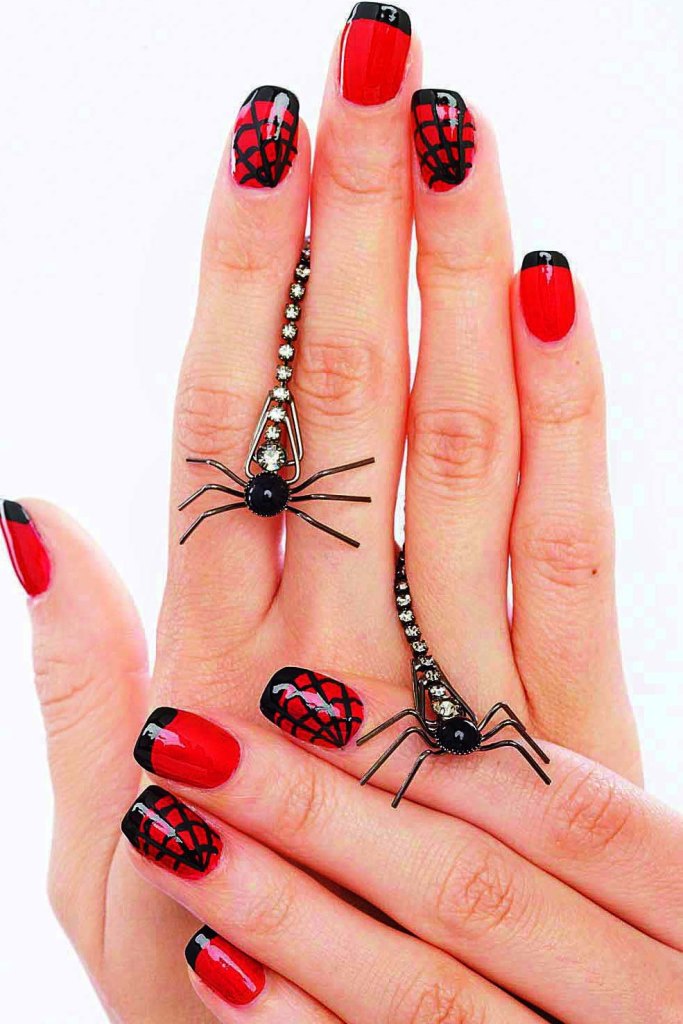
“The tip of this black and red French makes your nails appear longer,” says Yankee. “And the web is easy to make for a festive touch!”
Get the look:
- Apply two coats of red polish, like essie Nail Polish in A List on all nails. Let dry.
- Use a nail art brush, like SQULIGT 3PCS Nail Art Liner Brush Set, to paint a crescent moon on each free edge with black polish, like Sally Hansen Xtreme Wear Nail Polish in Black Out, to create the French tips.
- Use the brush and black polish to create a web on two accent nails per hand by painting three small lines fanning outward, then connect the lines with tiny curved lines; let dry. Finish with top coat.
6. Jolly Jack-‘o-lantern accents
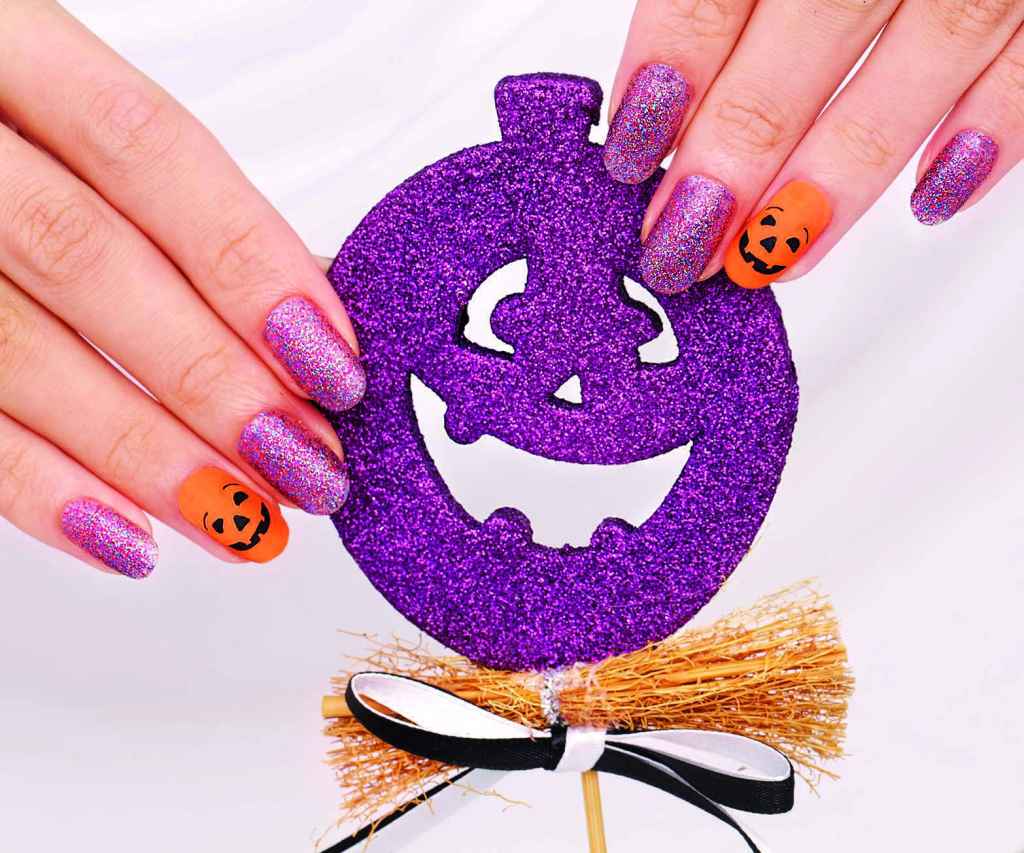
This design is glamorous, girly and playful, thanks to an eye-catching combo of purple glitter and smiling pumpkins!
Get the look:
- Apply two coats of purple glitter polish, like Sally Hansen Hard as Nails Xtremewear Nail Polish in Rockstar Pink on all nail except the ring fingernail on each hand. Let dry.
- Paint two coats of orange polish, orange polish, like essie Nail Polish in To DIY For, on both ring fingernails. Let dry.
- Use a black striper polish, like Sally Hansen I Heart Nail Art Striper in Black, to create the eyes, nose, eyebrows and mouth of a Jack-o’-latern on each orange nail; let dry. Finish with top coat.
7. Spellbinding black cat Halloween nail designs
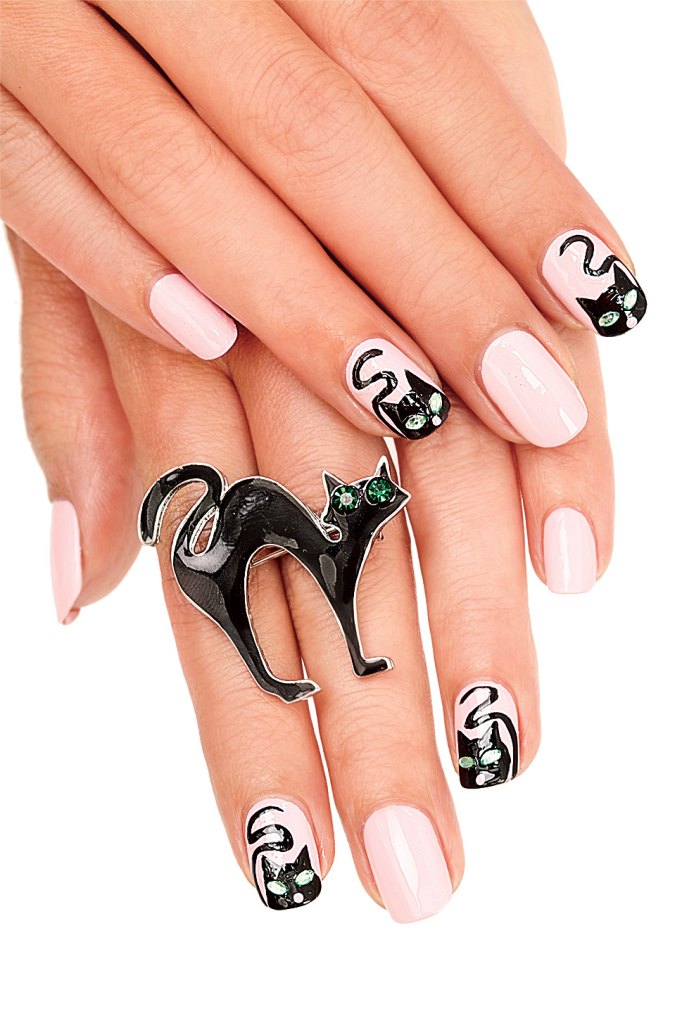
The combination of a black cat design on a light pink base makes this Halloween nail design great to pair with every day looks.
Get the look:
- Apply two coats of light pink polish, like Sally Hansen Insta-Dri Nail Polish in In a Blush, on all nails. Let dry
- On two accent nails per hand, use a black striper polish, like Sally Hansen I Heart Nail Art Striper in Black, to draw a large half circle along the free edge. Then, make two triangles at the top of the circle and at the side of the nails, make an “S” shape to form the tail; let dry
- Use a toothpick to place two green marquise rhinestones, like HOINCO 3120Pcs Green Nail Art Rhinestones, on each cat to make the eyes and a dot of the light pink polish to make the nose; let dry. Finish with top coat.
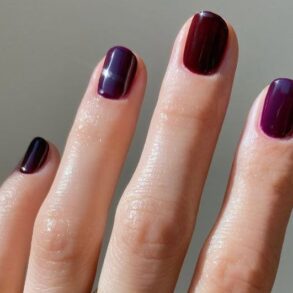
8. Red-hot vampire tips
Eye-catching red tips are the perfect finishing touch to a vampire costume, and better yet, the vertical drips create the illusion of longer nails. And while the “blood” drips pop against a nude base, celebrity manicurist Julie Kandalec says it can also be paired it with a silver polish.
Get the look:
- Apply two coats of nude-pink polish, like Olive & June Polish in The Queen Takes Her Tea With Milk, on all nails. Let dry.
- Use dark red polish, like essie Nail Polish in Berry Naughty and a nail art brush, like SQULIGT 3PCS Nail Art Liner Brush Set, to paint thin drips coming down from the free edge of nails; let dry. Finish with top coat.
9. Golden spiders Halloween nail designs
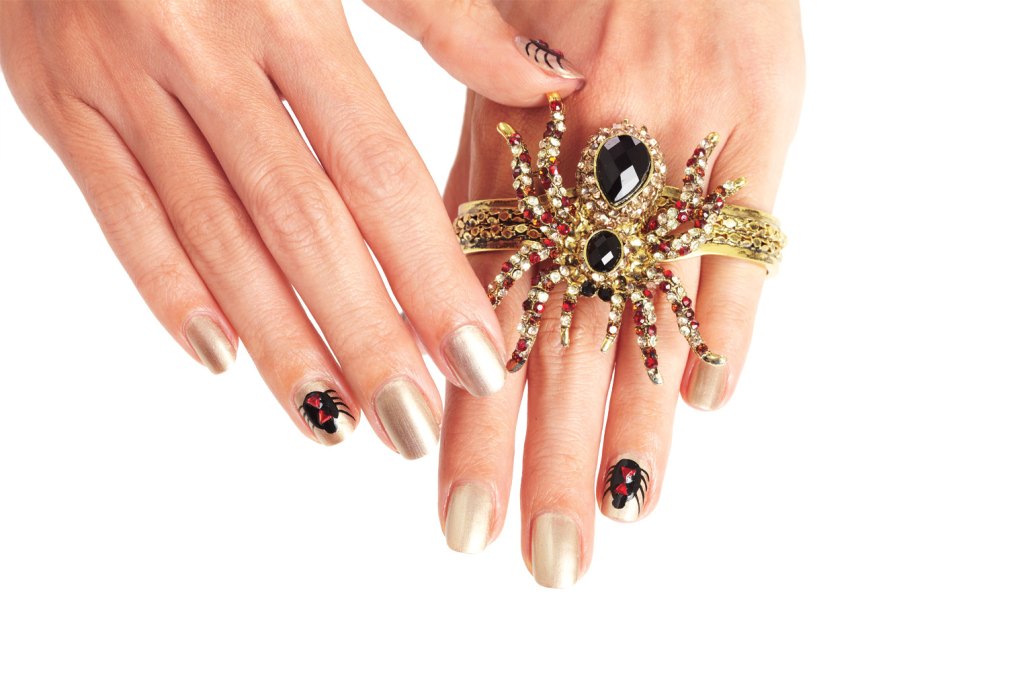
There’s no need to be scared of these spiders! The bejeweled critters and shimmery gold polish create a chic Halloween nail design and help detract from nail ridges at the same time.
Get the look:
- Apply two coats of metallic gold nail polish, like Sephora Nail Polish in Girls Night Out on all nails. Let dry.
- On two accent nails per hand, use black polish, like Sally Hansen Xtreme Wear Nail Polish in Black Out, to make an oval and a dot above it. Then, paint four “legs” on each side. Apply two red triangle rhinestones, like Allstarco Flat Back Triangle Tiny Acrylic Rhinestones, on each spider; let dry. Finish with a topcoat.
10. Chic candy corn-inspired ombre
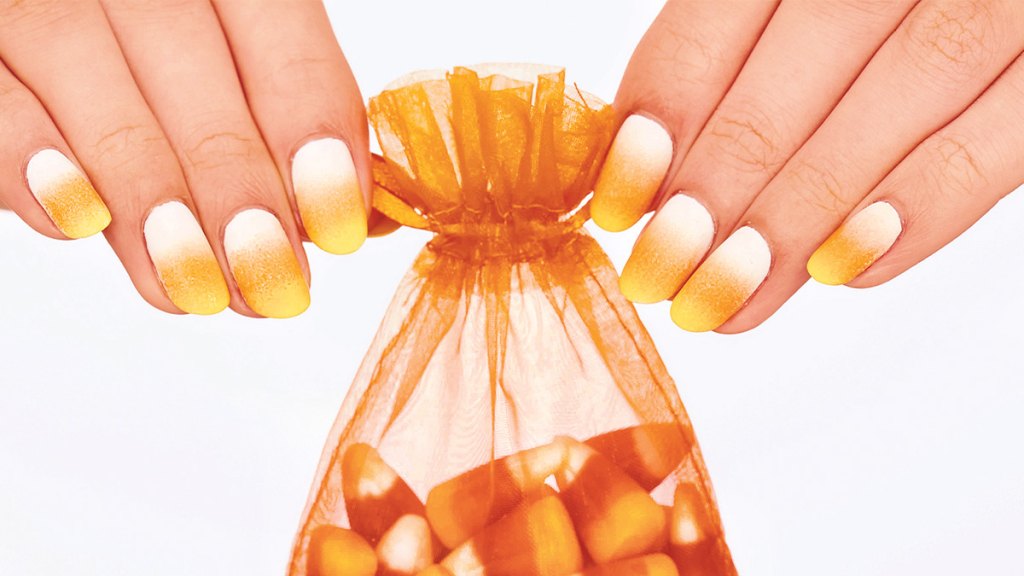
The tool you already have on hand that makes achieving this delectable design a cinch? A makeup sponge! Bonus: The gradient of hues on an ombre manicure give an elongating effect to shorter nail beds, says Kandalec.
Get the look:
- Apply two coats of white polish, like Sally Hansen Xtreme Wear Nail Polish in White On, on all nails. Let dry.
- Cut off the edge of a makeup sponge and paint three colors along the edge: white polish at the top, orange polish, like essie Nail Polish in To DIY For, in middle, and yellow polish, like Sally Hansen Xtreme Wear Nail Polish in Daisy Dukes, at the bottom.
- Align the sponge with the white at the cuticle end of the nail and press onto nails moving across horizontally. Repeat on all nails, then let dry.
- Use an orangewood stick wrapped in cotton and dipped in polish remover to clean excess polish off the edges and cuticles. Finish with top coat.
11. Neutral pumpkins, ghosts and webs Halloween nail designs
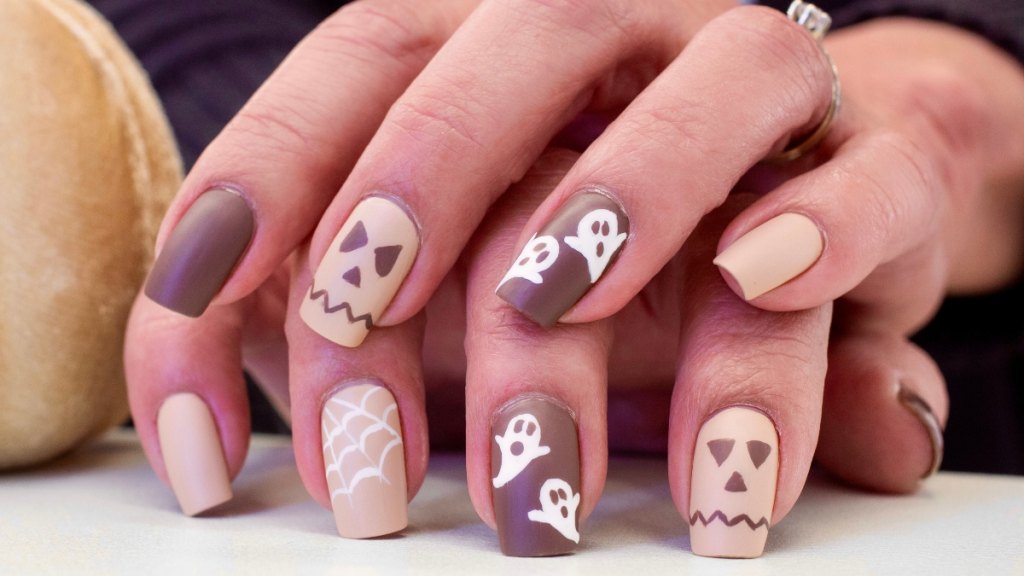
For a neutral manicure that’s still festive and spooky, look no further than this mix of Halloweenesque looks that will go with any outfit.
Get the look:
- On each hand, paint three nails with two coats of light nude polish, like Sally Hansen Xtreme Wear Nail Polish in Bare it All, then paint two coats of brown polish, like Sally Hansen Xtreme Wear Nail Polish in Central Bark, on the two remaining nails. Let dry.
- For the spider webs: On one nude nail per hand, use a white striping polish, like Sally Hansen I Heart Nail Art Striper in White, to create three diagonal lines from the bottom corner of the nail. Then create three lines going across in a wavy pattern to form a web-like design.
- For the ghosts: On one brown nail per hand, use the white striping polish to create two ghost-like shapes with a tail an arms; let dry. Then, use the brown polish and a dotting tool, like HiMo 5 pc 2 Way Dotting Pen Tool, to create eyes and a mouth on each ghost; let dry.
- For the Jack-o’-lantern faces: On one nude nail per hand, use a nail art brush, like SQULIGT 3PCS Nail Art Liner Brush Set, and the brown polish to draw two triangles for the eyes, a triangle for the nose and a zigzag line for the mouth. Let dry. Finish with top coat.
12. Pretty pumpkin heart accent
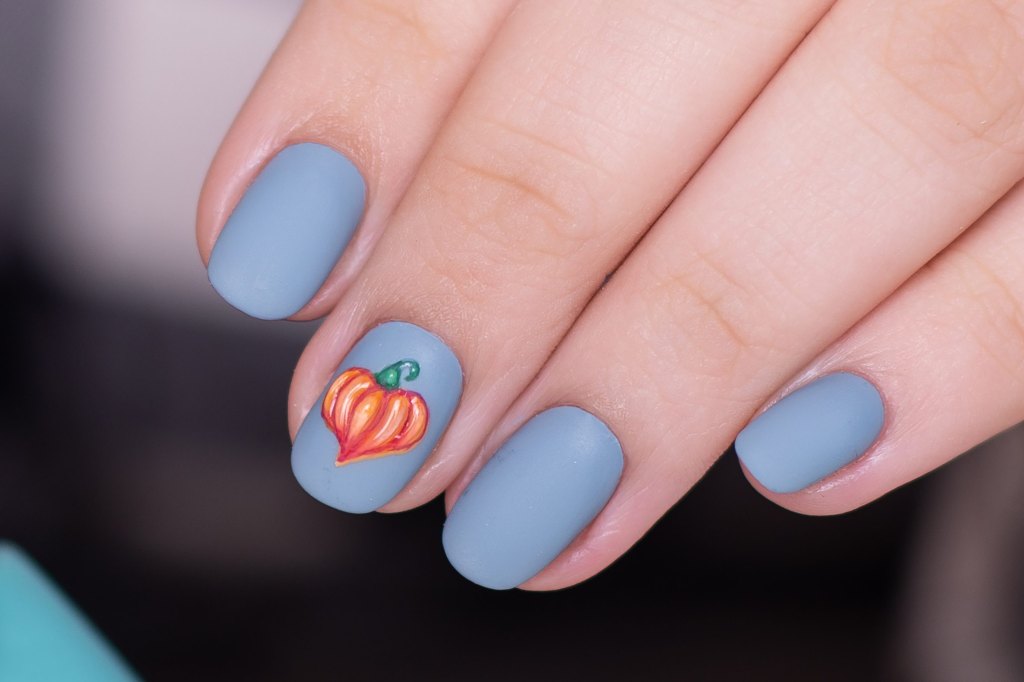
Add feminine flair to nails with a heart-shaped pumpkin on top of a subtle blue-gray base.
Get the look:
- Apply two coats of a dusty, grey-blue nail polish, like Sally Hansen Insta Dri Polish in Slow M-Ocean, on all nails. Let dry.
- On one accent nail per hand, dip a nail art brush, like SQULIGT 3PCS Nail Art Liner Brush Set, in a light orange polish, like OPI Nail Polish in Silicon Valley Girl and create a heart-shaped pumpkin. Using a darker orange polish, like OPI Nail Lacquer in OPI in Piazza Cake, and the nail art brush, outline the pumpkin and create the pumpkin’s lines.
- Draw a stem using green polish, like Sally Hansen Xtreme Wear Nail Polish in Tan-Lime and the nail art brush at the top of the pumpkin; let dry. Finish with top coat.
13. Bold black and orange color block
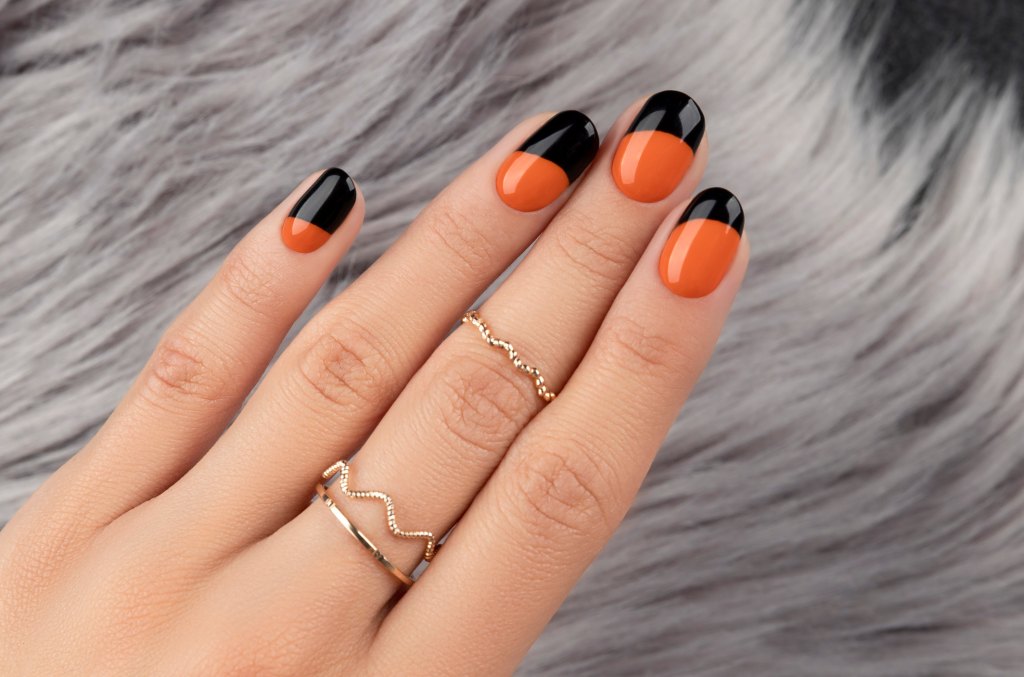
This black and orange Halloween nail design is perfect for beginners! That’s because it doesn’t require any special tools, and it doesn’t have to be perfect.
Get the look:
- Apply two coats of an orange polish, like essie Nail Polish in To DIY For, on all nails. Let dry.
- Using a black nail polish, like Sally Hansen Xtreme Wear Nail Polish in Black Out, create curved blocks of black from the tip of the nail, gradually getting thicker with each nail; let dry. Finish with top coat.
14. Striking black stars and orange French tips
Painting nails with this orange French tips and starry design from @polishbychloe on Instagram is simple to recreate and makes a stunning statement.
Get the look:
- Apply two coats of sheer pinky-nude polish, like ella + mila Nail Polish in Pure, on all nails. Let dry.
- Using bright orange polish, like Morgan Taylor Nail Lacquer in You’ve Got Tan-Gerine Lines, and a nail art brush, like SQULIGT 3PCS Nail Art Liner Brush Set, create crescent moon-shapes on the tips of each nail; let dry.
- Use a black striping polish, like FingerPaints Striping Polish in Ch-Art-Coal to create 2-3 small, diamond-shaped stars spaced out on each nail bed. Add small clusters of black dots as well near the stars; let dry. Finish with top coat.
15. Frightful ‘flying’ miniature ghosts Halloween nail designs
For a more subtle Halloween nail design, try this ghoulish look from @NailArtBreak on YouTube.
Get the look:
- Apply two coats of black polish, like Sally Hansen Xtreme Wear Nail Polish in Black Out, on all nails. Let dry.
- Using a dotting tool, like HiMo 5 pc 2 Way Dotting Pen Tool, and a white polish, like Sally Hansen Xtreme Wear Nail Polish in White On, create 4-5 thick dots on each nail, and then drag the polish from the dot down to make a curved tail.
- Next, use the dotting tool and black polish to create 2 small dots for eyes and a dot for the mouth on each ghost; let dry. Finish with top coat.
This post was originally published on this site be sure to check out more of their content.