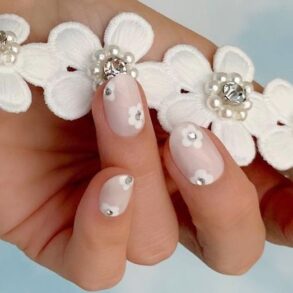
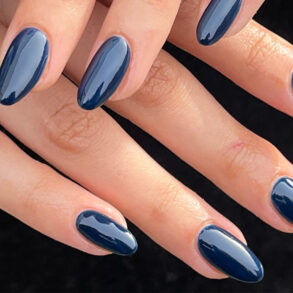
If there is a way I can skip the long, costly process of a gel manicure in the salon, I’m going to try it. Press on nails have become huge as the quality has improved over the last decade. However, if you’re like me and get glue all over when applying them or find yourself shedding nails in public, you might be looking for a simpler solution. The internet’s interest in semi cured gel strips has shot up 167 percent in the past year, as people grow curious about how to get the gel nail look without the time and money commitment that comes with a salon appointment.
What are semi cured gel strips?
“Semi cured gel nail strips are made of multiple layers of real gel that are partially cured under an LED light about 60 percent of the way,” explains celebrity nail expert Pattie Yankee. “The semi cure makes them super flexible and allows for easy application.”
What is the difference between semi cured gel strips and fully cured gel strips?
While semi cured gel strips need a minute or so under an LED lamp, fully cured gel strips, like those from Glaize, come cured and ready to go. They’re “made from real gel that we UV cure in our factory, with adhesive on the back, which enables them to stick to your nails. They give you the same look and feel as salon gels but are much more convenient and affordable,” explains CEO and founder Gina Farran.
The benefit of these is that you can apply them anywhere. “The Glaize team has applied them on a plane, a train and in the back of a taxi, which is great if you don’t have time to make it to a salon,” says Farran. “Many of our customers are busy parents who don’t have the time or freedom to make it to a salon.”
How do I use semi cured gel strips?
The process overwhelmed me a bit at the jump because I’m certainly no professional nail artist. However, I was pleasantly surprised by how easy it turned out to be. The first order of business is prepping the nails, which Yankee says is a crucial step. Farran notes that prepping your nails helps remove any excess oils so the strips go on seamlessly.
Once nails are prepped, “Size and apply the strips to a dry, clean nail bed. Smooth each strip over the nail plate with firm pressure starting at the cuticle area and moving towards the tip of the nail,” explains Yankee. “Next, use nail clippers to remove the majority of the excess length, and finish by filling in a downwards motion to remove any remaining excess, giving you a smooth finish with a clean edge,” instructs Farran.
If you’re using semi cured gel strips, you’ll then need to cure nails under an LED light for 45 to 60 seconds, notes Yankee. The final step is simply filling and smoothing any persistent jagged edges.
The benefits of semi cured gel strips over other gel manicure methods
“It gives you the perfect gel manicure every time with no messes,” says Yankee. Plus, many brands, like Dashing Diva, have designed nail art and special effects that would be expensive and hard to achieve in a salon, she notes. With a good formulation, semi cured gel strips stay super strong. They harden to your nails so there is “no chipping or scratches, and they truly last for 14 days, protecting your nails while they grow.”
Farran adds that gel strips are non-damaging, as compared to techniques that require acetone or a nail drill to remove gel. We also love how affordable the gel strips are, so we can swap out our manicures before checking our bank account.

