

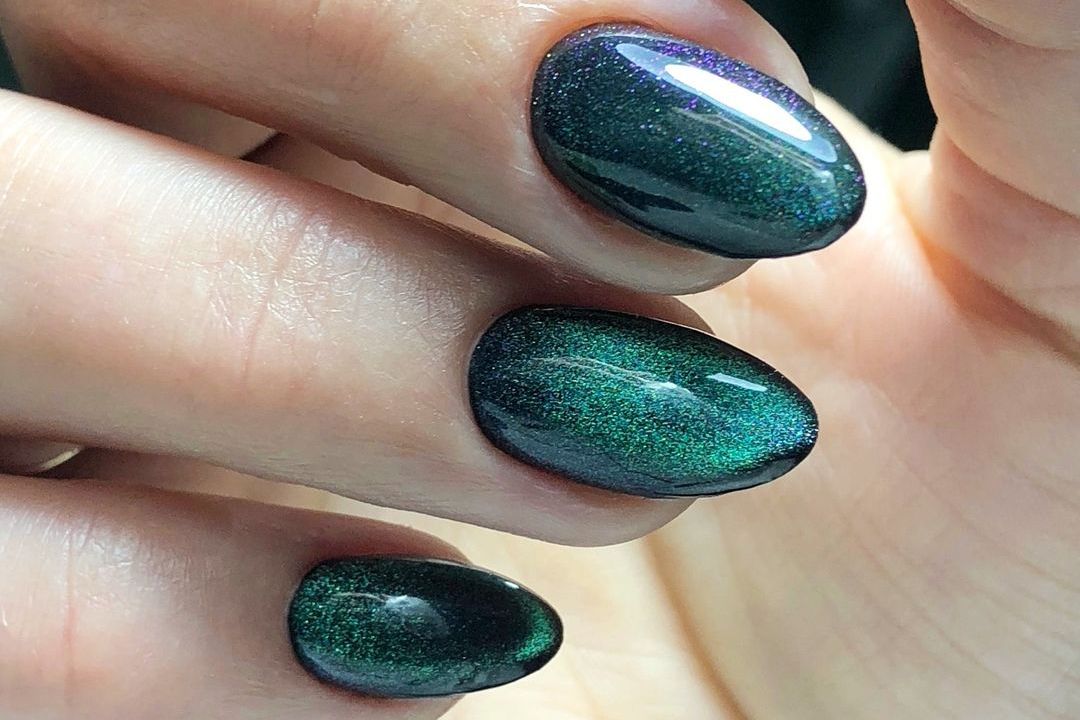
Cat eye nails capture the best elements of a few of today’s biggest nail trends. They’re a little bit glittery, a little bit metallic, but they also have a minimalist and luxurious vibe to them that makes them easy to wear across nail shapes, skin tones, and styles.
“Also referred to as velvet nails, cat eye nails get their name from their dimensional effect that’s akin to a cat’s iris,” says Mazz Hanna, celebrity manicurist and CEO of Nailing Hollywood. “There are a lot of different ways to get creative with this look using jelly topcoats, chrome finishes, and beyond.”
We’ve got the 411 on cat nails below along with a full rundown of how to create the look. Spoiler: You need a special polish and the technique feels very futuristic!)
What Are Cat Eye Nails?
Cat eye nails get their name because they’re loosely inspired by the mesmerizing iris of felines.
“It might not be obvious at first glance, but cat eye nails resemble the reflective, kaleidoscopic look of a cat’s eye,” says Michelle Nguyen, nail expert and founder and CEO of PLA Nails. “The effect is created by using a magnet to move the small pieces of iron in the gel polish around.”
That said, this look requires a special type or polish, a magnetic tool, and a little creativity. Don’t let that dissuade you, though — it’s surprisingly easy to recreate and you can revel in your artwork afterward!
How to Do Cat Eye Nails
Follow these easy steps for a gorgeous set of cat eye nails.
Step 1: Gather Supplies
To DIY cat eye nails, you’ll need to have the following on hand:
- Base Boat
- Magnetic Gel Polish (which should include the magnet)
- Shiny top coat
Step 2: Prep Your Nails
“Start by cleaning your nails and applying a base coat to protect them and ensure a smooth surface for the polish,” Nguyen says. Allow the base to cure completely before moving on.
Step 3: Apply Magnetic Polish
Once the base color is dry, Nguyen says to apply a coat of the magnetic cat eye nail polish to one nail at a time. “You want to make sure to work quickly for the next steps while the polish is still wet,” she says
Step 4: Create the Cat Eye Effect
Immediately after applying the magnetic polish to one nail, hold the magnet over the nail without touching it directly. Nguyen says, “Hover the magnet around the nail in a circular motion, being sure to avoid touching the polish. You’ll see the polish shift and create a cat-eye effect due to the magnetic particles in the polish reacting to the magnet.”
Pro tip: Each magnetic polish typically comes equipped with its own magnet—often in the cap of the polish.
Step 5: Repeat for Each Nail
Repeat this process for each nail, working one at a time so you can create the cat eye effect while the polish is still wet. Each nail should take approximately 10 to 15 seconds.
Step 6: Apply Top Coat and Cure
Seal your cat eye nails with a clear top coat and either allow it to dry or, if using a gel top coat, cure under light. “This will also help protect your nail art and make it last longer,” Nguyen says.
The Best Cat Eye Nail Polishes
Remember, you’ll need a special polish to recreate this look.
“While there are some brands who make cateye polish with traditional lacquer, the easiest way to achieve this is with gel,” Hanna says. “When purchasing gel polish, you want to look for brands who have ‘velvet’ or ‘cat eye’ gel.” Some of her favorites for this are Oyster Velvet by Gelcare and Kinetic by Cirque Colors.
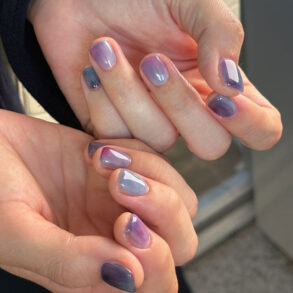
As for color choice, you can wear this design in practically any hue. For a more authentic look, though, Nguyen suggests using actual cat eye coloring as your inspiration. “They come in blue, green, yellow, brown, among many others,” she says. “So you can simply pick your favorite color and achieve a stunning cat eye look.”
This post was originally published on this site be sure to check out more of their content.