All linked products are independently selected by our editors. If you purchase any of these products, we may earn a commission.
Before the pandemic changed our approach to beauty treatments, I used to spend the weeks after a nail appointment excitedly looking forward to the next one. In the meantime, I’d scour manicurists’ Instagram accounts and save scores of #nailspo posts. Having my nails done was the one luxury I afforded myself but as costs have risen, things have changed. Now, even a simple gel colour — no French tip, no elaborate nail art — can set me back up to £40 at my local salon.
So I bit the bullet and bought myself a cheap gel nail kit with a UV lamp from Amazon. I’m no professional so the quality isn’t exactly up to scratch, but I can do it from the comfort of my own home and without shelling out a small fortune every month. Sorted, right?
Wrong. A 2023 study found that radiation from UV nail lamps can damage DNA in human cells. Now, the study looked at 20-minute exposures to UV between one and three times daily — i.e. a lot longer than most of us would spend with our hands under a UV nail lamp (and more research is needed to understand the full impact of UV gel nail lamp use in everyday life) — but regardless, I’m keen to reduce my skin’s exposure to UV.
The only safe solution seemed to be traditional nail polish — the kind that takes an age to dry. (No matter how long I leave my nails, I always end up smudging the polish, and the colour tends to chip within a week.) But it turns out I was missing a trick. Recently, I discovered an alternative: dip powder manicures.
Dip powder manicures enlist a combination of colourful, fine-grain powder alongside adhesives, top coats and buffing tools to achieve a sturdy, acrylic-like finish. The results are said to last just as long as an in-salon gel or acrylic job — all without the need for curing.
While dip manicures aren’t new (they were invented in the 1990s by a company called SNS), the technology has predominantly been used in salons. Lately, though, a handful of at-home kits have become available. One brand that I’ve heard about time and time again is Sassy Saints, a UK-based company which aims to help consumers become their “own salon technician”.
If you’re as chronically online as I am, you might’ve been served Instagram ads for the At-Home Manicure Kit. The videos are mesmerising and show just how easy it is to paint, dip and buff your nails to salon-level perfection. Even better? The brand promises three-week retention. It’s safe to say that I was intrigued, particularly as the process does away with the need for a UV lamp entirely. Could this supposedly simple kit replace my professional manicure? I had to find out.
Sassy Saints At-Home Nail Manicure Kit, £110 £69
What comes in the Sassy Saints At-Home Nail Manicure Kit?
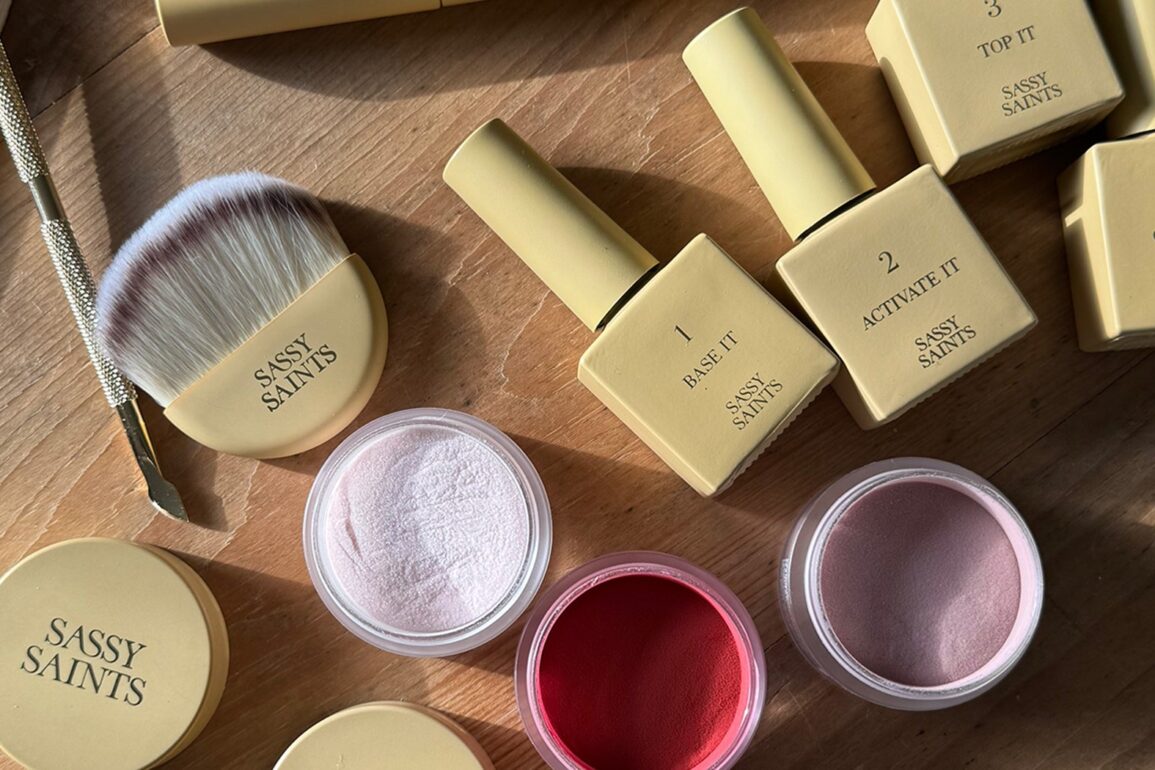
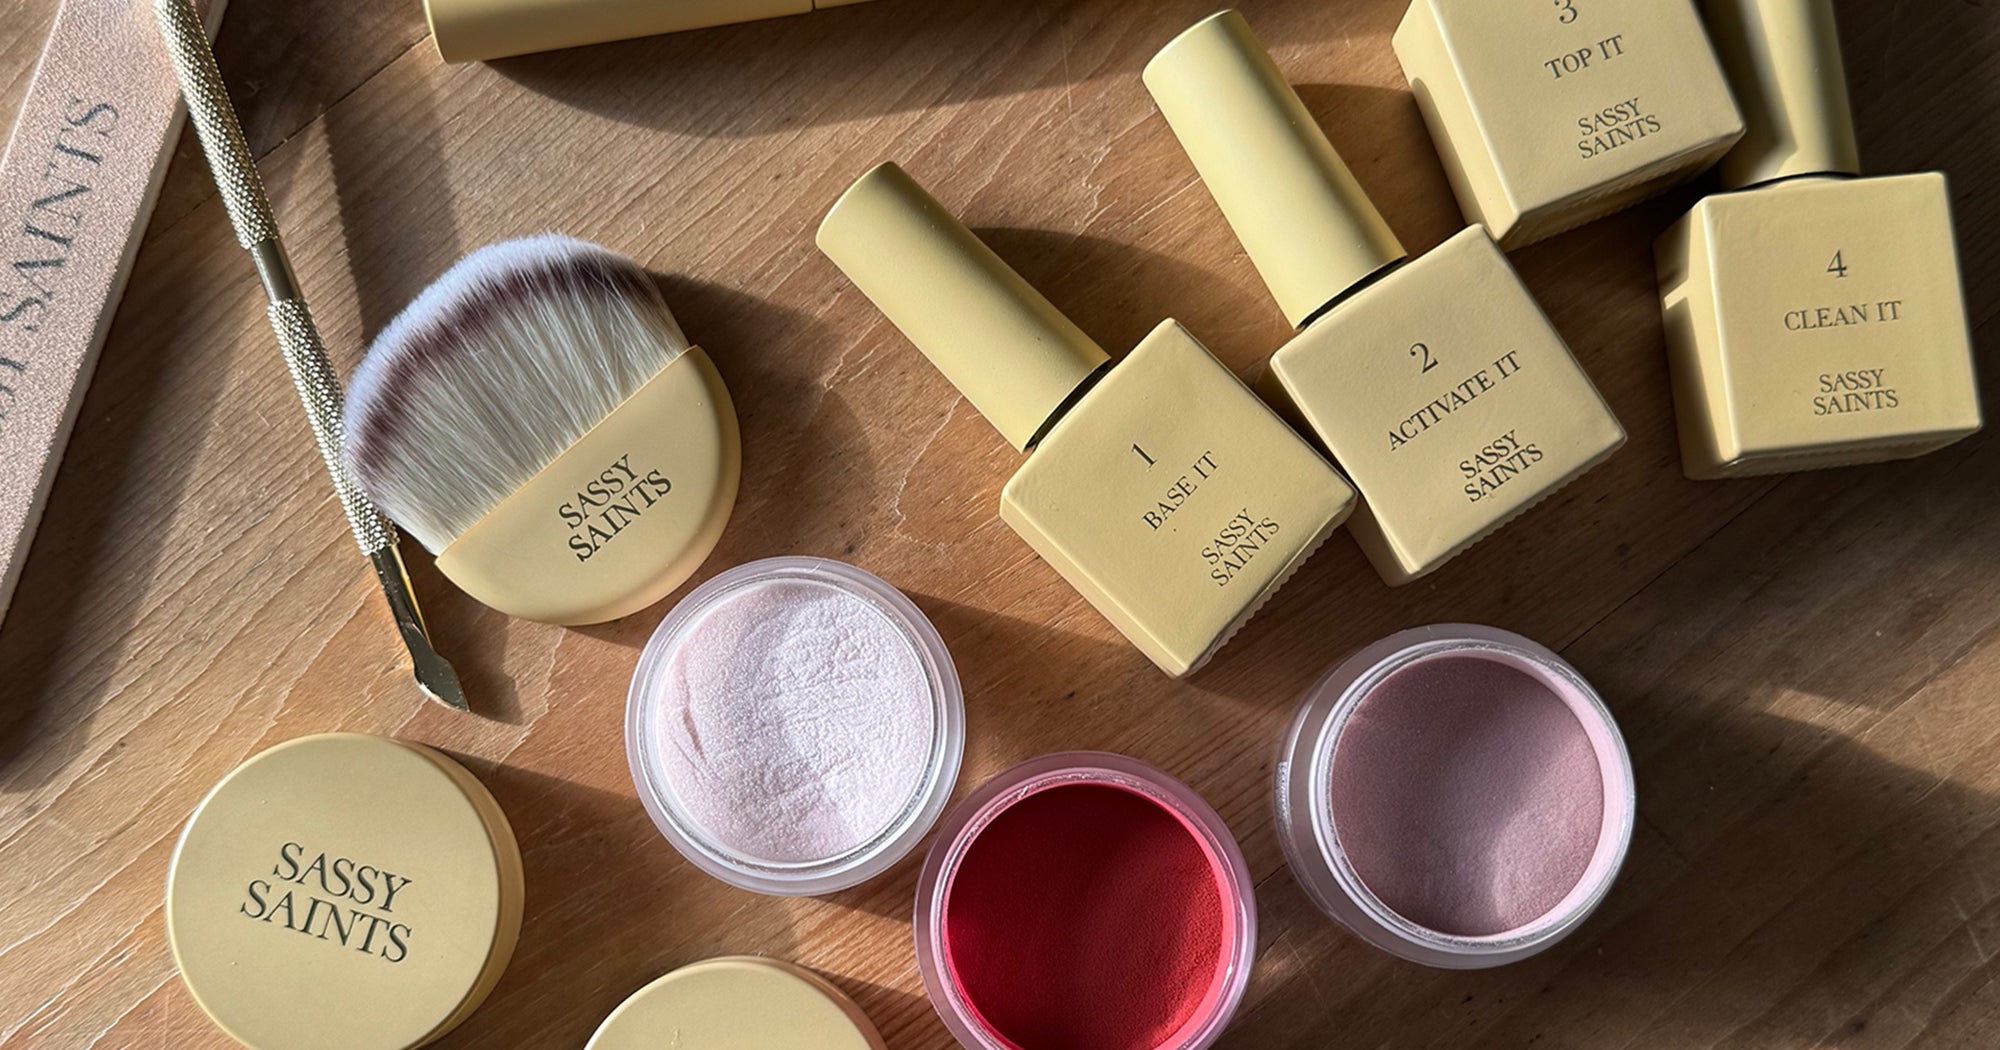
You can see why Sassy Saints is perfect social media fodder. Its branding is very “clean girl” aesthetic: all-nude packaging with simple gold accents and sleek bottles. The Sassy Saints At-Home Nail Manicure Kit will set you back £110 for the full monty (though it is currently on sale). This includes one bottle of ‘base it’ base coat, one bottle of ‘activate it’ hardening activator and one top coat. Each bottle is labelled one, two or three to indicate the stage in the process. There’s also ‘clean it’ (a solution that removes stains and keeps brushes soft) and a spare nail brush. You also receive a nail file (one side fine, the other coarse), a metal cuticle pusher, a fluffy powder brush, a double-ended primer and cuticle oil, and three free pigment powders, i.e. your three nail colour choices. (You can choose from three more colours but these will cost you extra.) I chose three of the most popular shades: Sparkle Suede (a light shimmery pink), Graceful Goddess (a pink mauve) and Bordeaux Babe (a deep burgundy). Each pot of pigment will supposedly last you 30 manicures.
How does the Sassy Saints At-Home Nail Manicure Kit work?
I have to admit that when I first read through the instructions, I was overwhelmed. Each bottle corresponds to a step so you start with bottle one (base coat) and move on to bottle two (activate) then three (top coat) to complete the process. However, each stage comes with sub-instructions which you need to follow if you want the best results and to prevent things like your brushes going hard, cracking or the pigment lifting. The instructions don’t come in the kit itself. Rather, you scan a QR code which takes you to a digital instruction manual. Helpfully, this includes videos to simplify the process.
You start off with the prep, which involves filing your nails to the desired shape, buffing the nail plate to remove any oils and debris (subsequently helping the pigment stick better), pushing back the cuticles and priming the nail. Then comes the fun stuff, which consists of applying the base coat, dipping each finger into the powder at a 45-degree angle and tapping off any excess. You have to do this four times for each nail.
Lastly, you ‘activate’ the pigment with the hardener (several coats of this, with pauses to let it dry), go in with another buff to level things out, then apply the top coat and cuticle oil to finish.
What were my initial thoughts and the immediate results?
I’ll be honest: This takes a while. It took me about an hour and 45 minutes to do one hand, though I was taking my time and double-checking the instructions as I went along. According to the brand, once you’re a dab hand (pun intended) it should only take you around one hour each time. The longest process by far was the prep: filing, buffing and pushing back my cuticles. This is mainly because I haven’t been to a proper salon in so long and my nails are in very rough shape. (I have a bad habit of biting my nails when I’m feeling nervous, too.)
In comparison, the painting of the base coat and dipping was a lot more simple, though I will flag that it’s easy to forget how many times you’ve done this step. Were I not paying full attention, I just know I would forget and do one too many layers, which would lead to clumpy nails that are more likely to lift off or snap.
Likewise, you need to be careful with the application of the base coat and try not to get it on your skin. This is because it easily sticks to the skin, which means the pigment will also adhere to it. Ultimately, this can stain your cuticles and as you can see below, each one of my nails is ringed with a faint halo of red because I wasn’t careful enough. Happily, this is only really noticeable close-up so I’m not too mad about it. (I don’t have the steadiest of hands.)
Another flag is that this process can get a little messy, especially as you have to brush off the excess pigment — and it doesn’t always go back in the pot. It’s best to do your nails on a hard surface with some sort of cover for protection. (I used the branded newspaper that Sassy Saints included in the kit.)
As for the results, I am pleased. The colour is vibrant and glossy, and my nails feel very strong. While it did take a while to master, I found the process quite fun — I carved out a few hours to chill with a cup of herbal tea and some music to listen to.
What were the results after three weeks?
Well, colour me impressed. My nails look pretty good three weeks later — similar to my at-home gel manicures. As you can see, there’s plenty of growth around the cuticles and small chips at the tips and along the edges, but that tends to happen to me. This is probably because I’m often using my nails to open things (especially my thumb and forefinger), and therefore the polish here is naturally weakened. Comparing the before and after photos, the colour seems a little duller three weeks on, but I can’t see any significant scratches or marks on the surface, which is a win.
While looks are important, more significantly, the manicure feels pretty solid after three weeks. Also, I’m very happy to report that the initial staining on my skin faded away after a day.
My final thoughts
Overall, while I do think this process is a little more complicated than my at-home gel manicure, Sassy Saints’ three-week claim turned out to be correct. For this reason, I’m more than happy to set aside a quiet afternoon every month or so to do my nails. Especially if it saves me money and, more importantly, my skin from harmful UV rays.
This post was originally published on this site be sure to check out more of their content.

