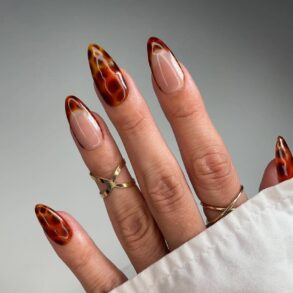
It all began with a Christmas present – I was spending way too much on monthly gel manicures and funds were tight, so I was overjoyed when I received the Mylee gel nail starter kit one year so I could learn to do my own nails at home.
The kit provided everything I needed to embark on DIY manicures – a UV lamp, lint-free wipes, Prep and Wipe solution, acetone polish remover, gel base and top coat, as well as a small assortment of basic gel polish colours. That was six years ago, and since then I have ventured into various nail art techniques (challenging when using your non-dominant hand) and different removal methods.
Over time, I’ve amassed quite a collection, experimented with different tools and products, and now have a basket overflowing with equipment. Writing for the Liverpool Echo, these are the products I’ve tested, the items I’d skip, and the essentials I couldn’t do without if I wanted to achieve a near-professional manicure at home.
I should preface this by saying that I am not a professional – merely a keen enthusiast – and these tips are simply things that have worked for me.
As well as getting shoppers exclusive access to the site’s Black Friday sale prices, there’s a host of advantages to Amazon Prime membership including next-day delivery, free Deliveroo and Hello Fresh perks, music, books and Prime Video. Usually £8.99 a month, you can now get a 30-day free trial to get access to the latest deals.
Free
Amazon
Gel polish colours
It is true that a manicure can only be as good as the products you use – investing in reputable brands for your gel colours will give you much cleaner results than some of the off-brands. I’ve been lured in by cheap deals before, only to be disappointed with lumpy consistencies, poor coverage or just tiny bottles (buyer beware on that point – I should have checked the listing!) My favourites have been MyGel, BlueSky and Mylee.
Nail art tools

(Image: No credit)
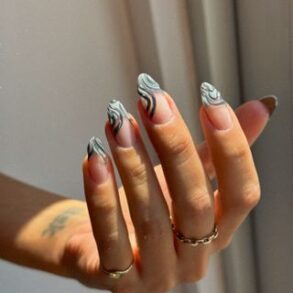
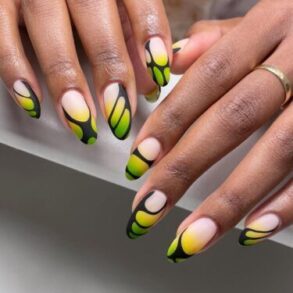
When trying out nail art at home, I’ve discovered that simplicity is often the best approach, particularly if you’re going it alone – bear in mind that any complex design you achieve with your dominant hand, you’ll need to replicate with your non-dominant hand for a balanced look. I frequently use a basic dotting tool or brush to create polka dots, simple flowers, or stripes.
Another effective method to enhance your homemade manicure is a straightforward accent nail in a matching glitter colour – I typically do this on my thumb and ring finger nails for a touch of sparkle for a glamorous evening out. And for the appropriate occasion, a classic French manicure never fails – don’t hesitate to play around with the colours on this.
If everything else doesn’t work out, you might consider some affordable nail art transfers – these seem like the secret to achieving a salon-style finish if you don’t have a steady enough hand for detailed nail art – just enjoy the process.
Gel polish removal products

(Image: No credit)
When attempting nail art at home, I’ve found it’s often best to keep things simple, especially if you’re DIYing it without help – remember whatever intricate design you manage with your dominant hand, you’ll have to repeat with your non-dominant hand to achieve a symmetrical look. I often use a simple dotting tool or brush to create polka dots, basic flowers, or stripes.
Another effective way to elevate your DIY manicure is a simple accent nail in a complementing glitter colour – I usually do this on my thumb and ring finger nails to add a bit of sparkle for a glitzy night out. And for the right occasion, you can’t go wrong with a classic French manicure – don’t be afraid to experiment with the colours on this.
When all else fails, you can consider some inexpensive nail art transfers – these feel like the cheat code to getting a salon-style finish if you lack a steady enough hand for intricate nail art – just have fun with it.
Gel polish removal products
The worst part about gel manicures is the removal process – it can be frustrating and time-consuming – I’ve tried all sorts over the years. We’ve all been chastised at some point at the salon for peeling our manicures off, damaging the natural nail beneath in the process and leaving an unsightly mess.
Much like the different techniques which vary depending on the salon you visit, there are so many options for at-home removal. All of the below processes begin with buffing the shine off the top coat with a nail file to penetrate the seal of the polish before starting removal.
You can go with the classic soak-off with a bowl of acetone. As I suffer from eczema, this method tends to irritate my skin, as more of it is exposed to the solution.
The way around this I have settled for is soaking individual lint-free wipes in the solution and using these spring-loaded nail clips. They apply gentle pressure to the nail to ensure the soaked pad is in constant contact with the nail while avoiding contact with the rest of your skin.
You can also buy “quick” gel remover products that look like bottles of nail polish. It is a thick gel you paint onto the nail after buffing the surface. It works by bubbling and breaking down the polish, and should allow you to wipe the residue off after just a few minutes. In practice, I’ve found that these solutions need at least a few coats to get through all of the polish, particularly if you’ve used a light shade which required multiple coats to achieve the desired coverage.
Finally, I have also used this USB-powered nail drill to file down really stubborn gel polish, though you have to have a very light touch with this, as you run the risk of damaging your natural nail if you go too far. I’d recommend starting on the slowest setting and applying minimal pressure while getting used to this technique.
After removing gel polish, it is important to wash your hands thoroughly and apply cuticle oil to the nail bed and surrounding skin to help replenish the natural oils stripped out by the removal process.
Gel nail kit storage and organisation

(Image: No credit)
Once you build up a collection of this size, things can get disorganised very quickly. As many of the gel polish bottles are opaque, so you cannot see the colour inside without opening each one to check. One of my Covid lockdown projects was to painstakingly number each bottle and label a nail art sample stick with the corresponding colour. It was actually quite therapeutic, albeit time-consuming. I picked up an inexpensive set of nail swatch sticks that did the trick, and the end result was so satisfying.
It was also pointed out to me when I pitched this piece that my storage solution of a ropey-looking basket is a little chaotic, and it is tricky to find the specific product I’m looking for mid-manicure. Narin Flanders recently reviewed the Mylee starter kit, and recommended Amazon’s BAFASO Nail Polish Organiser – currently 20% off for Prime Day.
If this has inspired you to embark on your own DIY gel nail journey, the basic Mylee gel nail starter kit is £64.99 on Amazon, and an even more budget-friendly option is the Rio 14 Day Gel Nails UV Lamp on LookFantastic for £34.99. If you’re looking to go all-out, Mylee has The Full Works Complete Gel Polish Kit which includes all of the basics included in the starter kit, plus eight gel colours, cuticle oil, a buffing block, three nail files, and wooden cuticle pusher sticks.
This post was originally published on this site be sure to check out more of their content.

